Pumpkin Spice Waffles with Pumpkin Brown Butter

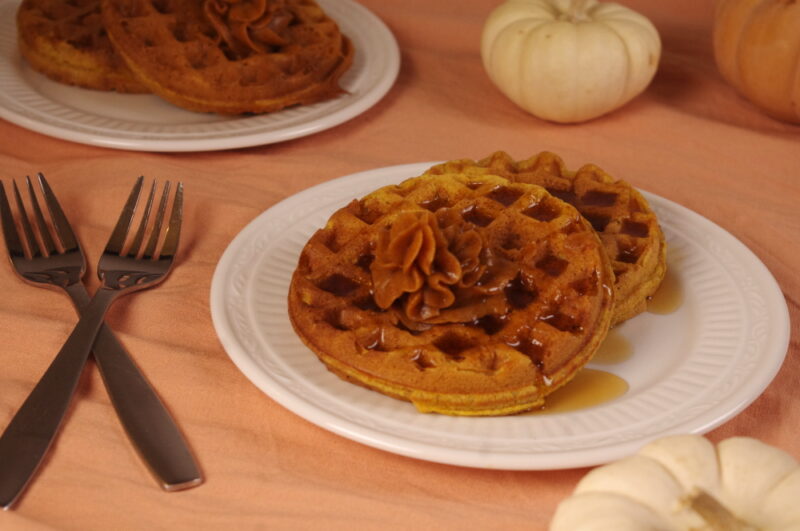
I’d say I’m firmly in the November-is-pumpkin-season camp, rather than the November-is-Christmas-time camp. But regardless of your own affiliation, I hope you will enjoy these pumpkin spice waffles with pumpkin brown butter. I recommend serving them with real maple syrup for the full flavor experience. It’ll be incredible in October, November, or whenever you need a little pumpkin indulgence.

Notes: The butter can be made up to several days ahead of time and kept in the fridge. To keep waffles warm and crisp while you finish cooking, place a baking tray in the center of your oven and heat to 200F. Transfer waffles from waffle iron onto the tray, and keep them warm until you’re ready to sit down and eat.

Waffles adapted from Smitten Kitchen. Butter adapted from Carolina Gelen.

Ingredients
Makes 20 mini waffles (pictured) or about 8 regular ones.

For the pumpkin brown butter:

  • 9 tbsp unsalted butter
  • 2 tsp milk powder
  • 1/2 cup canned pumpkin (you need a single 15oz can between the butter and the waffles)
  • 1/2 tsp salt
  • 1 teaspoons ground cinnamon
  • 1/4 teaspoon ground nutmeg
  • 1/4 teaspoon ground ginger
  • pinch of ground cloves
  • 1/4 cup light brown sugar
  • 1/2 teaspoon vanilla extract
  • 2 tbsp buttermilk (or any dairy milk)

For the pumpkin spice waffles:

  • 2 cups all-purpose flour
  • 1/4 cup packed light brown sugar
  • 1 1/2 teaspoons baking powder
  • 3/4 teaspoon baking soda
  • 1/4 teaspoon salt
  • 1 1/2 teaspoons ground cinnamon
  • 3/4 teaspoon ground ginger
  • 1/8 teaspoon ground cloves
  • 3 large eggs
  • 1 1/2 cups well-shaken buttermilk
  • 1 cup canned pumpkin (you need a single 15oz can between the butter and the waffles)
  • 3 tablespoons unsalted butter
  • Vegetable oil for brushing waffle iron or cooking spray

To make the butter:

Measure out 1 cup of pumpkin and set aside for the waffles. Keep what remains close to the stove for the butter.

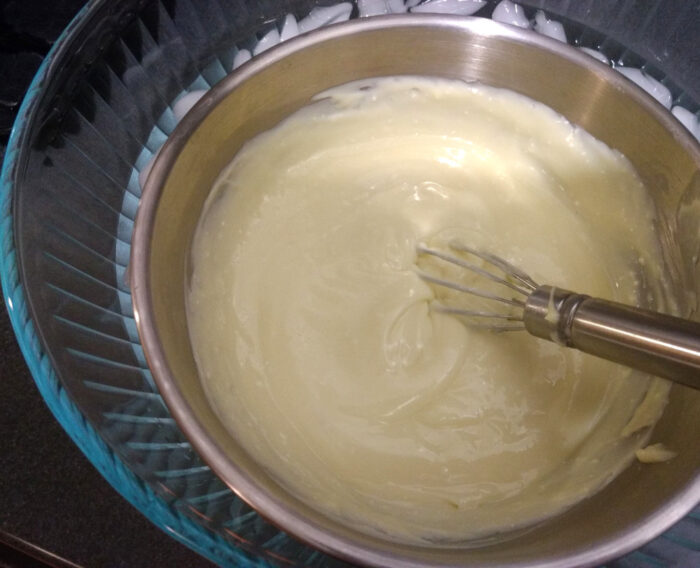
In a small saucepan, heat the 9 tbsp of butter over medium heat until melted. Add the milk powder, and whisk it up right away so it doesn’t clump up. Continue cooking on medium until the butter browns to a light brown color. Remove from heat and immediately whisk in the remaining pumpkin, whisking vigorously until the mixture becomes smooth and silky. Turn the burner down to low and put the pot back on the heat heat, whisking more or less constantly until the steam from the pumpkin almost stops (you’ll notice it steams a lot at the beginning, and then less and less as you keep cooking), about 3 minutes.

Remove from heat and let cool to room temperature. This will go faster if you transfer the butter to a bowl. Whisk in the remaining ingredients until fully incorporated, and then refrigerate until ready to serve.

To make the waffles:

Whisk together the dry ingredients (flour, sugar, salt, baking power, baking soda, and spices) in a large mixing bowl. Separate the eggs, tossing the yolks into the dry ingredients, and putting the whites in a separate medium bowl. Beat the egg whites to medium peaks and set aside.

Melt the butter and preheat your waffle iron. Add the buttermilk, pumpkin, and butter to the dry ingredients and then whisk until mostly smooth (small lumps are just fine, but no dry patches of flour). Add half of the beaten egg whites to the mixture and fold in with a spatula. Add the remaining whites and fold in until mostly combined (a few streaks of white are fine to leave). Portion and cook the batter according to the manufacturer’s instructions for your waffle iron.

To serve:

Spread the pumpkin spice waffles with the pumpkin brown butter and drizzle liberally with maple syrup. Any leftover waffles, once they are fully cooled, will freeze quite well in an airtight bag or container. Just pop them in the toaster to reheat. Leftover butter is great on toast or pumpkin bread or pancakes…

Crisp Fennel Salad with Olives

crisp fennel salad with olives

This crisp fennel salad with olives possesses the perfect balance of flavors, and it looks as pretty as it tastes. It’s an interesting one for me, because I don’t especially like green olives! And yet here, alongside crunchy, aromatic fennel, bright citrus, and flavorful, salty cheese, they’re faultless.

Although it’s at its very best freshly dressed, it also packs pretty well for a summer picnic, or with dressing separate, for a camping trip. I’ll usually eat this as the main course, but a little protein on the side doesn’t go awry.

Barely changed from my favorite, Smitten Kitchen, who sourced it from Cafe Alto Paradiso.

Ingredients Serves about 3 as a main or 5-6 as a side dish.

  • 2 large fennel bulbs with fronds (get 3-4 if they’re smaller than an orange)
  • 1 cup castelvetrano olives
  • about 1 tsp fresh orange zest (from about 1 medium orange)
  • 1 lemon
  • 1/4 cup olive oil
  • 2 tbsp white wine or champagne vinegar (I have also used rice vinegar)
  • 1/4 tsp crushed red pepper flakes
  • 1/4-1/2 tsp salt
  • freshly ground black pepper
  • 3 ounces (85g) Pecorino Romano cheese

For the dressing:

Wash and dry the citrus. Zest the orange to get about 1 tsp of zest, lightly packed in. Zest part of the lemon to get about 1/4 tsp of zest. Add both to a small bowl. The bald orange can now be put away in the fridge for a snack later, but keep the lemon handy. Add to the bowl the olive oil, vinegar, red pepper flakes, several big grinds of black pepper, and 1/4 tsp salt and whisk together thoroughly. Set aside.

For the salad:

I like to cut the green fronds off of the fennel bulb before washing them each separately. Peel off any tough, thick, brownish looking outer leaves from the bulbs and then wash them, and throw all the fronds into a colander to wash that way. Keep the fronds aside for now. If the bulbs are very large, cut them in half lengthwise, then use a mandoline or knife to thinly slice them (an 1/8th inch thinner). I like to start slicing at the top and go until I hit the hard piece at the bottom, so that they stay together while I’m slicing them. The last little bit at the base of the bulb can be discarded. Throw all the sliced fennel in a large bowl.

If your olives have pits, smash them with the flat of a chef’s knife or a meat tenderizer and then pull out the pits. If already pitted, tear roughly in half with your hands to get those nice craggy edges. Either way, chop coarsely and add to the bowl with the fennel. Grab a handful of the fennel fronds and chop until you have about a cup, and add that to the bowl too. Juice the whole lemon over the fennel mixture and toss to coat evenly.

If using a mandoline, switch to a finer blade to shave the cheese, or if using a knife, just slice it as thinly as you possibly can. Cut the slices into bite-sized pieces, if necessary. It’s easier to measure the weight as you shave, rather than cutting a chunk to weigh before you start shaving (to avoid winding up with a thick final slice that you can’t really cut).

Serving and storing:

Keep the dressing, fennel mixture, and cheese separate until ready to serve, then toss it all together, and season with additional salt and pepper, if desired. Leftovers will keep for a couple days in the fridge in an airtight container.

crisp fennel salad with olives on table    

S’Mores Rice Crispy Treats

s'more rice crispy treats

I made these s’mores rice crispy treats to use up leftover graham crackers and marshmallows and from summer camping, before they go stale and the mallows inevitably become a sad, sticky amalgamation of once-pillowy puffs…If you’re already a fan of cereal treats, you probably don’t need any further convincing, but if you think rice crispy treats are a bit disappointing, then hear me out. They don’t have to be plain! In this version, brown butter and salt add a little extra something on top of classic s’more flavors. Serious sweet tooths of all ages can rejoice! As another plus, these are quick to make and they don’t require turning on the oven.

Notes: This small-batch recipe uses about half a bag of mallows. If you want those thick squares you see in bakeries, double the recipe and use an 8×8 square pan. If you have regular or jumbo size marshmallows lying around, no worries, just go by weight instead of volume and use a clean, oiled pair of scissors to snip about 1/5th of them into little pieces for the portion you save for stirring in at the end.

Based off of Ruth Tam’s Brown Butter Rice Krispie Treats.

Ingredients
Makes 8 small bars

  • 100g milk chocolate
  • 4 tbsp (56g) unsalted butter
  • 5 cups (213g) mini marshmallows, divided (see below)
  • 1/8 tsp vanilla extract
  • 1/8 tsp salt
  • 3 cups (80g) rice crispy cereal
  • 3 sheets (40g) graham crackers (or sub digestive biscuits)

Line a 9-inch loaf pan with foil and spray the foil with cooking spray.

Place the graham crackers in a plastic bag and crush with a rolling pin, or crush them in a large mortar and pestle. You want some crumbs and some bite-sized pieces. Set aside. Soften the chocolate in the microwave; it doesn’t have to be fully liquid, but it should be very soft.

Put the butter in a medium pot over medium heat and cook until it becomes a nice nutty brown color. Turn off the heat immediately and add about 4 cups of the marshmallows, along with the salt and vanilla. Use a heat-proof spatula to stir until the marshmallows are completely melted, being sure to scrape all that brown buttery goodness off the bottom of the pan. Add the cereal and stir until fully coated.

Working add the chocolate, graham cracker bits, and remaining marshmallows and stir until it becomes marbled with chocolate, but not fully combined. Scrape the mixture into the prepared loaf pan and press down with the spatula into one even, lightly-packed layer.

Allow to cool to room temp and then use a chef’s knife to cut into 8 squares. Store at room temperature in an airtight container, separated by parchment paper, or wrap individually in  cling film until ready to eat.

Spaghetti with Garlic and Oil (Aglio e Olio)

spaghetti with garlic and oil

Spaghetti with garlic and oil is my latest quick-dinner fascination. I can just snag some parsley on the way home from work and the rest of the ingredients are probably already waiting in my pantry. I’m pretty much always in the mood for some pasta, and this dish is a nice change from a run-of-the-mill spaghetti with red sauce. It’s full of flavor thanks to an abundance of garlic and Parmesan, and strikes a gorgeous balance between the cool, freshness of the parsley and the heat of the red pepper flakes. It’s got a lovely deliciousness-to-prep-time ratio, and measuring isn’t really required once you’ve made it a time or two.

Note: Yes, I know. It does look like an unreasonable amount of garlic. But the method of preparation takes a lot of the kick out of it, honestly!

Adapted slightly from Diane Morrisey.

Ingredients
Serves 4

  • 1 lb dry spaghetti (any kind, I usually use whole wheat, but regular or gf varieties also work well)
  • 1/3 cup extra virgin olive oil
  • about 45g fresh garlic cloves (1/2 – 1 head, depending on size)
  • 1 1/2 tsp red pepper flakes (my ideal amount, feel free to adjust to taste)
  • 3.5 oz Parmesan cheese (a big chunk or coarsely shredded is fine)
  • 2/3 cup finely chopped flat-leaf Italian parsley (a small bunch)

Put a large pot of water with 1 tsp of salt on high heat and cover until it comes to a boil. Peel and thinly slice all of the garlic cloves, and wash and trim the stems from the parsley. Chop the leaves. Cut the cheese into chunks, if using a block, and then put it into a blender. Blend until coarsely ground (like the powdery parm you get in a jar, but fresher).

When the water is boiling, add the pasta and cook until al dente, according to package directions. Make sure to save 1/3 cup of the pasta water. While the pasta is cooking, heat the olive oil over medium heat in a large saute pan. Add the sliced garlic and the red pepper flakes and cook, stirring occasionally, until the garlic is crispy and golden. Remove from heat and add 1/3 cup of the pasta water along with the parsley.

When the pasta is done, drain into a colander. If your garlic is ready, transfer the pasta to the pan immediately. If it’s not, rinse the pasta with cold water to stop it sticking together. Once the pasta is in the garlic pan, add the ground cheese and use tongs toss everything until well mixed. Serve immediately. Store leftovers in an airtight container in the fridge and microwave to reheat, if desired.

Ruby Chocolate Raspberry Fools

ruby choc rasp fools close up

A simple dessert that’s rich and light at the same time. With pink hues that are sure to delight the eye, and fresh, juicy raspberries harmonizing with the toasty, fruity notes of ruby chocolate. My mousse-like version has a few more steps than a traditional fruit fool, but it’s still quite quick and easy to make and has the added benefit of being more stable! Ruby chocolate raspberry fools are perfect for finishing off a fancy dinner or as a romantic Valentine’s Day treat. This recipe makes just enough for 2, but it doubles or triples easily if you want to make it for a group.

Ingredients
Serves 2

  • 1/2 cup heavy whipping cream
  • 2 oz (57g) ruby chocolate
  • 3 oz (85 g) fresh raspberries
  • 1/4 tsp corn starch
  • 1/8 tsp vanilla
  • 2 tsp sugar
  • 1 tsp triple sec, chambord, or water
  • A small piece of dark or ruby chocolate for garnish (optional)

Preparation:

Wash the raspberries, drain, and set aside in a small bowl. Melt the chocolate (I prefer to use a double boiler here). Out of the 1/2 cup of cream, measure 2 tbsp of cream into the chocolate. Pour the rest of the cream into a small mixing bowl and set aside. Once the chocolate begins to soften, whisk the mixture until completely smooth. Remove the top of the double boiler and set aside to cool.

Beat the cream to medium peaks. Optionally, you may remove about 2 tbsp at this point and set aside in a pinch bowl for garnish. Add cornstarch and vanilla and continue beating the cream to stiff peaks.

Set aside the two prettiest raspberries for garnish. To the rest, add the sugar and liqueur (or water) and then mash it all up with a fork until soupy (small lumps are ok). Let sit for now.

Combining and assembly:

Set out two small glasses, ramekins, or jars. Ensure the chocolate has cooled enough that the bowl is no more than slightly warm to the touch. Add about a third of the whipped cream to the chocolate and fold it in gently. Add half of the remaining cream and fold in gently. Place a heaping tsp of the berry mixture into the bottom of each glass. Then take the remaining berry mixture and the remaining whipped cream and add it to the chocolate mixture. Fold 2-3 times, but no more, leaving the mixture quite streaky.

Use a spoon to transfer the mixture to the glasses, dividing it evenly. Top with the reserved cream and raspberries. Cover the glasses with a beeswax wrap or cling film and chill for at least 30 minutes before serving. Ruby chocolate raspberry fools will keep well in the fridge for at least 24 hours.

ruby choc rasp fools

Popovers with Clementines and Cream

popovers with clementines and cream

Popovers are truly a delightful food; light, crisp, and hollow, just waiting to accommodate whatever fillings your heart desires! Here I’ve served them with a lazy pastry cream (no tempering or straining required here) and chewy half-candied clementines–both of which can be made ahead, by the way. None of the prep is difficult, but popovers and pastry cream both require some precision to come out well, so make sure you familiarize yourself with all the steps before beginning. These luxurious popovers with clementines and cream are the ultimate weekend brunch dish.

Popover recipe from Chowhound and pastry cream based on this one from Serious Eats.

Ingredients
Makes 12 popovers

For the pastry cream:

  • 1/2 cup sugar
  • 3 tbsp corn starch
  • 1/4 tsp salt
  • 2 tsp pure vanilla extract
  • 4 large egg yolks
  • 2 cups milk
  • 2 tbsp cold unsalted butter

For the popovers:

  • 3 tbsp butter
  • 2 eggs, at room temperature
  • 1 cup milk, at room temperature
  • 1/2 tsp vanilla
  • 1 tsp sugar
  • 3/4 tsp salt
  • 1 cup flour

For the clementines:

  • 6 clementines or mandarin oranges
  • 1 cup sugar
  • 1 cup water

A few important notes before you begin:

First, on timing. Usually, pastry cream needs to chill for a couple of hours. In this recipe it doesn’t matter. The ice bath is enough, and you can just chill it for however long is convenient after that. I find I have time to comfortably prepare either the cream or the clementines while the popovers are in the oven, but not both. Pick one to prep in advance, or prep both in advance to make your morning easy.

Second, on popover ingredients. I’m the first one to ignore qualifiers like “at room temperature”, but here, it really does matter. As does oven temperature accuracy. For a light, hollow popover consider double-checking your oven temp with an oven thermometer. At the very least, preheat for a full 20 minutes before baking. And don’t use your eggs and milk straight out of the fridge!

To prepare the clementines:

Lay a sheet of parchment paper on a cookie sheet or wire rack. Wash the clementines thinly sliced them, discarding the top and bottom most slices that are mostly peel. Place a cup of sugar and a cup of water in a large pan and heat on low until the sugar dissolves. Add the sliced clementines and increase the heat to med/med-high and bring the syrup to a boil. Boil the slices for 15 minutes and then use tongs to pull the slices out and lay them out on the prepared parchment.

To prepare the pastry cream:

Prepare an ice bath by filling a large bowl a little under halfway with ice and cold water. Set aside.

pastry cream in an icebath
The cream in its ice bath

In a small, cold saucepan, whisk together the sugar, cornstarch, and salt. Add the egg yolks and vanilla and whisk until smooth. Add the milk and whisk again until smooth. Place the saucepan over medium-low heat (low if using gas), and whisk frequently as the mixture heats. Do not walk away. When it just begins to steam a little, turn the heat up to medium and whisk constantly until the mixture becomes thick and custard-y. At first it will seem nothing is happening, but suddenly it will thicken up quickly.

At this point, remove it from the heat, add the butter, and stir until it’s disappeared. Transfer the mixture into a heat proof bowl and set in the ice bath. Whisk until cooled. Remove from the ice bath and press a piece of clingfilm down onto the surface of the cream to prevent a skin from forming. Chill in the fridge until ready to serve (up to 3 days).

To make the popovers:

Preheat oven to 425 F (218 C). Melt the butter and measure 1/2 tsp into each well of a 12 cup muffin tin (or a pair of 6-cup tins). Put the remaining tbsp of butter into a blender along with the other ingredients and blend until completely smooth (under a minute). Alternately, you can whisk the wet ingredients together in a medium bowl and then whisk in the dry ingredients until no lumps remain.

Place the muffin tin into the oven on the middle rack and leave until the butter is sizzling and starting to brown (2-3 minutes). Take it out and divide the batter evenly between all 12 cups. Put back in the oven and bake for 20 minutes. Reduce temperature to 350 F (177 C) and bake for about another 15 minutes until the popovers are a deep golden brown. Remove from oven, and pan, and serve popovers immediately with the clementines and pastry cream. I like to tear them in half, spoon the cream into the pockets, and top each half with a slice or two of citrus.

Delicata and Chevre Tacos

delicata and chevre tacos

Tender squash, caramelized onions, goat cheese, black beans, and adobo come together with surprising ease to create a sweet, spicy, tart chorus of flavors that you need to be shoveling into your face ASAP. Quick enough for a weeknight dinner, and easily scalable for a crowd, delicata and chevre tacos taste incredible and make for a well-balanced meal.

Ingredients
Makes 12 tacos

  • 1 medium delicata squash
  • 1 medium yellow onion
  • 2 tbsp olive oil
  • 1/2 tbsp adobo seasoning
  • 1 15-oz black beans (or black refried beans)
  • ? oz chevre cheese
  • A handful fresh cilantro (optional)
  • A handful of roasted pepitas (optional)
  • Hot sauce of choice (optional)
  • 12 corn tortillas

Preheat the oven to 400 F (205 C). Check if your adobo has salt. If so, no need to add any. If not, remember to add a 1/4 tsp salt to the squash with the adobo.

Wash the delicata and slice in half lengthwise. Use a large spoon to scoop out all the seeds and guts and discard. Turn the halves flat-side down on the cutting board and use a chef’s knife trim the ends. Slice the delicata the short way into 1/4 inch slices. Toss the slices with 1-2 tbsp olive oil and the adobo seasoning and spread them over a sheet pan. Bake for 20-25 minutes, stirring once in the middle, until the squash is tender, but not falling apart.

As soon as the squash is in the oven, quarter the onion, peel the outer layers off, and then slice. Heat a small saucepan over medium-low heat and add about a tbsp of olive oil, then all of the onion. Cook for about 25-30 minutes. The heat should be low enough that the onion doesn’t brown quickly, and the sizzling is fairly quiet. Stir periodically, and if you start to get lots of brown bits sticking to the pan, deglaze it with a little water and then continue cooking. Once the onion is brown and soft and greatly reduced in volume, deglaze before removing from the heat.

Meanwhile, wash and chop the cilantro, and crumble the chevre. I like to put each ingredient out in a small bowl and then let everyone make up their own tacos. If using whole black beans, rather than refried, rinse and drain them and stir in a sprinkle of garlic powder, or extra adobo. Place the beans in a small bowl and microwave for about a minute or put them in a small pot and heat over low heat until hot. Wrap the stack of tortillas in aluminum foil.

When the squash is done, turn off the oven and put the tortillas in for about 10 minutes until warm and pliable. This is a good time to finish any prep that you didn’t get to, let the onions cook a bit longer if they aren’t looking caramelized enough, or wash dishes.

Place a couple tortillas on each plate. Load them up with a little bit of everything, sprinkle with hot sauce and pepitas, if desired, and serve while it’s still warm!

Peach Tarts with Cookie Butter Frangipane

peach tart with cookie butter frangipane

So, one great thing about being an adult is that no one can stop you from adding cookie butter to your patisserie. These rich mini peach tarts with cookie butter frangipane are just irresistible from the bottom of their crisp, buttery shells to the top of their peach-adorned frangipane crowns.

You should know, before embarking on this pastry journey, that this recipe is rather involved—start to finish it takes 3-4 hours. However, the par-baked tart shells and the peach filling can both be made in advance and stored in airtight containers (peaches in the fridge, shells on the countertop). I wouldn’t do the shells more than 1 day in advance, but the peaches could be done a few days ahead. You will need 6 4″ mini tart pans and an electric mixer.

Fillings created by me. Shells adapted from King Arthur Flour.

Ingredients
Makes 6 5″ tarts.

For the peach filling:

  • 2 lbs of ripe peaches (about 5)
  • 3 tbsp sugar
  • a couple pinches of cinnamon

For the shells:

  • 1 3/4 cups + 2 tbsp white flour
  • 6 tbsp sugar
  • 3/8 tsp salt
  • 12 tbsp unsalted butter, cold (1.5 sticks)
  • 1 large egg yolk
  • 2 tbsp bourbon (or use milk)

For the frangipane:

  • 1/2 cup superfine almond flour
  • 4 tbsp unsalted butter, softened
  • 1/4 cup sugar
  • 2 tsp flour
  • 1 egg
  • 1/4 tsp vanilla extract
  • 3 tbsp cookie butter

To prepare the peach filling:

peeling a blanched peach

Wash the peaches, and use a paring knife to score and X on to bottom of each one. Note: If your peaches are very ripe indeed, you may be able to peel them without blanching them first.

Otherwise, do the following:
Fill a medium bowl halfway with ice and cold water to create an ice bath. Heat a medium pot of water to boiling. Carefully lower in the peaches and cook for 1 minute. Transfer the peaches from the pot to the ice bath. Drain the water from the pot, but keep the pot handy. Once cooled enough to handle comfortably, peel off all the skin from the peaches (starting from the edge of the X you made).

Once they’re peeled, slice the peaches all the way around the middle and twist the halves apart. Remove the pits. Save half of the prettiest peach and set aside. Chop all the rest into small pieces and toss them back into the pot. Add the sugar and cinnamon and put the pot on medium heat. Cook the peaches, stirring occasionally, until the fruit is just starting to fall apart and the juices begin to reduce down (something like 20 minutes).

While you’re waiting, carefully slice the reserved peach half into thin, even slices to use for decorating later. Keep them in an airtight container in the fridge until you’re ready to garnish.

Cool the peach filling to room temperature before putting into the tart shells. Do not fill the shells until ready to bake.

To prepare the tart shells:

Place dry ingredients in the bowl of a food processor, or a medium bowl. Mix or pulse a few times. Cut the butter into cubes and add to the bowl. With your hands, rub the butter into the flour until it becomes a sandy mixture, or pulse in food processor until the butter disappears. Add the egg yolk and bourbon and mix/pulse until uniform, scraping down the sides of the bowl as needed. The mixture will be very crumbly. If it does not come together when you squeeze it in your hand, add an additional tbsp of liquid and pulse a few more times. Cover and chill for a minimum of 30 minutes.

docking the tart shells

Meanwhile, preheat the oven to 375 F (190 C).

Take the dough out of the fridge and unwrap it. Divide evenly between 6 4” non-stick tart pans. Use your thumbs to first press the dough up the sides of each pan, then flatten the remainder onto the bottom so that all sides have an even thickness of crust. Squeeze any excess dough together into a flat shape and bake later just like a cookie until it’s golden brown.

Use a plastic fork or wooden dowel (to prevent damage the non-stick coating) to dock the bottom of each crust thoroughly. I am too lazy, and have so far gotten away with it with this recipe, but if you want to ensure your crust keeps it’s shape, place a piece of parchment or foil over each and fill them with pie weights or dry beans before baking. It helps to spray the side of the parchment/foil that will touch the dough lightly with oil. Bake the tart shells for 15 min then pull them out to cool. Leave the oven on if you intend to make the frangipane and then bake the tarts right away.

To prepare the frangipane and assemble:

In a small bowl, cream the butter, cookie butter, and sugar. Add the vanilla and egg and beat until combined. Finally, add in the flours and beat until smooth.

Put about a 1/4 cup of peach filling into each par-baked tart shell and smooth out the surface with a spoon or spatula. Any remaining peach filling is delicious for breakfast over plain yogurt! Divide the frangipane evenly between the tarts and use an offset spatula (or a regular spatula) to spread it evenly over the peach filling. Note that if your peach filling is still hot, your frangipane will melt and won’t spread well either. If the crust is still somewhat warm, you can get away with it if you work relatively quickly, but I wouldn’t go for it if they’re straight out of the oven.

Bake the fully-assembled tarts for another 28-33 minutes at 375 F (190 C) until the frangipane and the shells are both lightly browned. Cool until comfortable to handle (or cool completely) and then remove from the pans. Just before serving, arrange the reserved peach slices in a fan shape over half of each tart. The tarts keep well covered in the fridge for a few days, but they taste best if you let them come back to room temperature before eating.

peach tart cross section

Glossary of Terms

In this glossary I’ve collected some cooking terms you’ll come across in my (and other) recipes. It is non-exhaustive, but I have tried to cover some common ones that don’t usually come up outside of kitchens. I will continue to update it as I go along.

Beat (verb)

The process of mixing something rapidly, usually with a whisk or the whisk attachment of an electric mixer to incorporate small air bubbles into a mixture. Synonymous with whip.

Blanch (verb)

To cook food by very briefly submerging in boiling liquid. Can be used as the only method of cooking for things that cook very quickly/don’t need much cooking, or as a means of softening an ingredient or loosening skin on produce.

Boil (verb)

To cook food in liquid that is it’s boiling point (212 F for water). Boiling is visually identified by constant, large bubbles bursting from the surface of the liquid. Particularly useful for cooking foods like pasta and potatoes.

Cream (verb)

The process of beating softened butter until it appears fluffy. Best done with an electric mixer. Does not work if the butter is firm. Creaming butter incorporates in a small amount of air, which can be desirable in many baked goods for their texture, and also helps with evenly distributing the butter through the batter/dough.

Deglaze (verb)

The process of loosening cooked-on material from a hot pan by introducing water or other liquid. I’ve written a more detailed article about this here.

Dock (verb)

This one usually appears in recipes for crusts. To dock is to pierce all over (often with a fork) in order to create holes that steam can escape through. This helps prevent big bubbles from forming under the crust and leaving it misshapen after blind baking (pie weights also help). The same principle as cutting slits in the top of a pie, or piercing potatoes with a fork before baking.

Double Boiler (noun) aka Bain Marie or Water Bath

A pot of water on a heat source with a heat-proof bowl (or other vessel) sitting in the top of it. Used to heat things gently through indirect contact with the heat source. Domestocrat has a good run down of how to make and use a double boiler here. You can also buy a purpose-made one, if you like. Useful on the stovetop to do things like melt chocolate or heat eggs, useful in the oven for things like custards, or at a buffet to keep food warm.

Fold (verb)

The process of gently combining two mixtures or ingredients to avoid knocking air out. Best done with a spatula. Sometimes done by dragging the spatula through the center of the bowl, then scraping around the edge, turning the bowl, and repeating. Sometimes done by stirring bottom to top with a spatula held horizontally while turning the bowl, always going in the same direction. Video on this coming soon. The goal is to mix slowly, softly, and until just barely mixed.

Julienne (verb)

To cut into thin, even matchsticks. Usually this is a technique used for vegetables.

Peaks (noun)

Mountain- or wave-like formations in batter that has been beaten to an increased volume. Usually categorized as soft, medium or firm, and stiff. A good description (with photos) of these different levels of stiffness can be found at here an Fine Cooking. Most commonly we refer to peaks when talking about whipping cream or egg whites.

Poach (verb)

To cook food in liquid that is not quite simmering (visually, there is very little movement in the liquid and the temperature measures around 150-180 F). Particularly useful in cooking delicate food like eggs, fish, or soft fruit.

Simmer (verb)

To cook food in liquid at a temperature just below the boiling point (visually, the liquid produces constant, fine bubbles and the temperature measures around (180-210 F). Particularly useful for cooking soups and sauces, reducing liquids, and cooking things like rice or lentils.

Seize (verb)

The change in texture that occurs when melting chocolate is overheated or contaminated with water. The chocolate becomes dull and grainy or solidified and difficult to work with and rather than smooth and shiny. It can sometimes be salvaged by adding a small amount of solid oil (like cocoa butter or coconut oil), but will have a different texture and can no longer be tempered.

Temper (verb)

Eggs and other mixtures that can curdle: The process of slowly adding a hot mixture to a (temperature-sensitive) cold mixture while whisking quickly so as to warm the temperature-sensitive ingredients gradually and prevent them from curdling. Many recipes call for this step, most commonly ones with eggs such as custards, sauces, or eggnog.

Chocolate: The process of heating and cooling chocolate precisely to change the crystalline structure of the cocoa butter to improve its texture, appearance, and stability. Tempered chocolate melts more smoothly, is stronger and stores better, and has a lovely shiny appearance. King Arthur Flour has a good guide on doing this here.

Whip (verb)

The process of mixing something rapidly, usually with a whisk or the whisk attachment of an electric mixer to incorporate small air bubbles into a mixture. Synonymous with beat.

Wholesome Brownies (Small Batch)

Brownies are the bomb, but they do tend to be an empty-calorie sort of bomb. Sometimes, that’s perfectly fine, sure, but wouldn’t it be nice to make them more often without sacrificing all of your dietary principles? Though not low-calorie, these wholesome brownies are almost entirely made from whole foods, which means the calories aren’t empty at all, but rife with nutrients and fiber. In fact, the only added fat or sugar in the recipe is the modest handful of chocolate chips stirred into the batter before baking.

These brownies also happen to be dairy free and they work very well with oat flour, if you want them to be gluten free too. Despite all of this non-traditionalism, they’re fudgy, sweet, deeply chocolatey, and easy to make. This small-batch recipe is here for you any time you need some chocolate in your life, and don’t want to worry about accidentally eating 15 brownies by yourself.

Note: you will need a food processor.

Inspired by, but significantly modified from, this recipe at Paleo Gluten Free Eats.

Ingredients
Makes 6 brownies

  • 100g raw sweet potato (around 1/2 a small potato)
  • 60g pitted medjool dates (about 1/4 cup, packed)
  • 6 tbsp natural almond butter (by “natural”, I mean no added oil or sugar. peanut butter is also good here.)
  • 1 egg
  • 2 tsp vanilla extract
  • 1/2 tsp almond extract
  • 1/3 cup whole wheat or whole oat flour
  • 1/3 cup unsweetened dutch cocoa
  • 1/2 tsp baking powder
  • 2 tbsp granulated erythritol (you can sub sugar if you prefer)
  • 1/2 tsp instant coffee granules (optional)
  • 1/4 tsp salt (reduce to a pinch or two if your nut butter is salted)
  • 1/4 cup semi-sweet chocolate chips

Preheat the oven to 325 F. Thoroughly grease 8×4″ loaf pan or a 6×6″ square baking pan, or line it with parchment paper. Chop the dates and pour boiling hot water over them. Let soak for about 10 minutes.

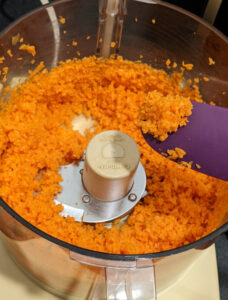
Wash the sweet potato and cut into chunks. No need to peel it. Put the chunks into the bowl of a food processor and pulse repeatedly until minced (think sweet potato meal, but not sweet potato puree!). Drain the dates and add them to the potato. Pulse a few times to help cool the dates down. Add the eggs, nut butter, and extracts and blend until smooth. Add all remaining ingredients, except chocolate chips, and pulse until well combined.

Remove the blade from the food processor bowl, or transfer batter to another bowl, and stir in the chocolate chips. If you like, you can save a few of them to decorate the top of the brownies. Or not. Transfer the batter to your prepared pan and spread into an even layer. Press in any reserved chocolate chips, and bake for 25 minutes.

Allow the brownies to cool in the pan for 10 minutes to set, and then run a knife or rigid spatula around the edge of the pan. Flip the brownies out, or use the edges of the parchment to lift them out, and cut into 6 pieces. These wholesome brownies are great warm out of the oven, and they’re even better the next day when they’ve gotten nice and fudgy.

Once they’re cooled to room temp, store them in an airtight container on the counter. If you wind up keeping them more than a couple days, store in the fridge.

Notes on scaling up: I find these always turn out better as a single small batch, because they’re more uniformly cooked. However, if you wish to double this recipe, use an 7×11 inch pan or an 8 inch square pan. You may have to transfer the batter to a separate bowl to stir in the chocolate chips, unless your food processor is very large. Bake for an additional 3-4 minutes.